Open the CRM tab, have an admin accept the Data Processing Addendum once, then work through the first-week checklist below: branding, payments, customers, team, phones, first quote. The CRM is included on both plans, Starter and Pro. Everyone on your account can open it; what each person sees depends on their role.
Who can open the CRM
- Plans: the CRM is part of Starter ($49/month) and Pro ($89/month). Each plan includes one user; each extra user is $19/month. See Billing and trials.
- Roles: every member has one of three roles — Admin, Sales or Field. Admin and Sales are the office; Field is a tech. You set roles when you invite people: Invite your team.
- First open: before the CRM holds any customer data, an admin sees One step before you add customers and accepts the Data Processing Addendum with Accept and open the CRM. Until then, everyone else sees Your company's admin hasn't accepted the Data Processing Addendum yet. Ask them to open the CRM and review it.
A few CRM features are Pro plan only: payroll time tracking (Time), memberships (Service agreements), diagnostic checks on readings, and more than one extra price book. Everything else on this page is on both plans.
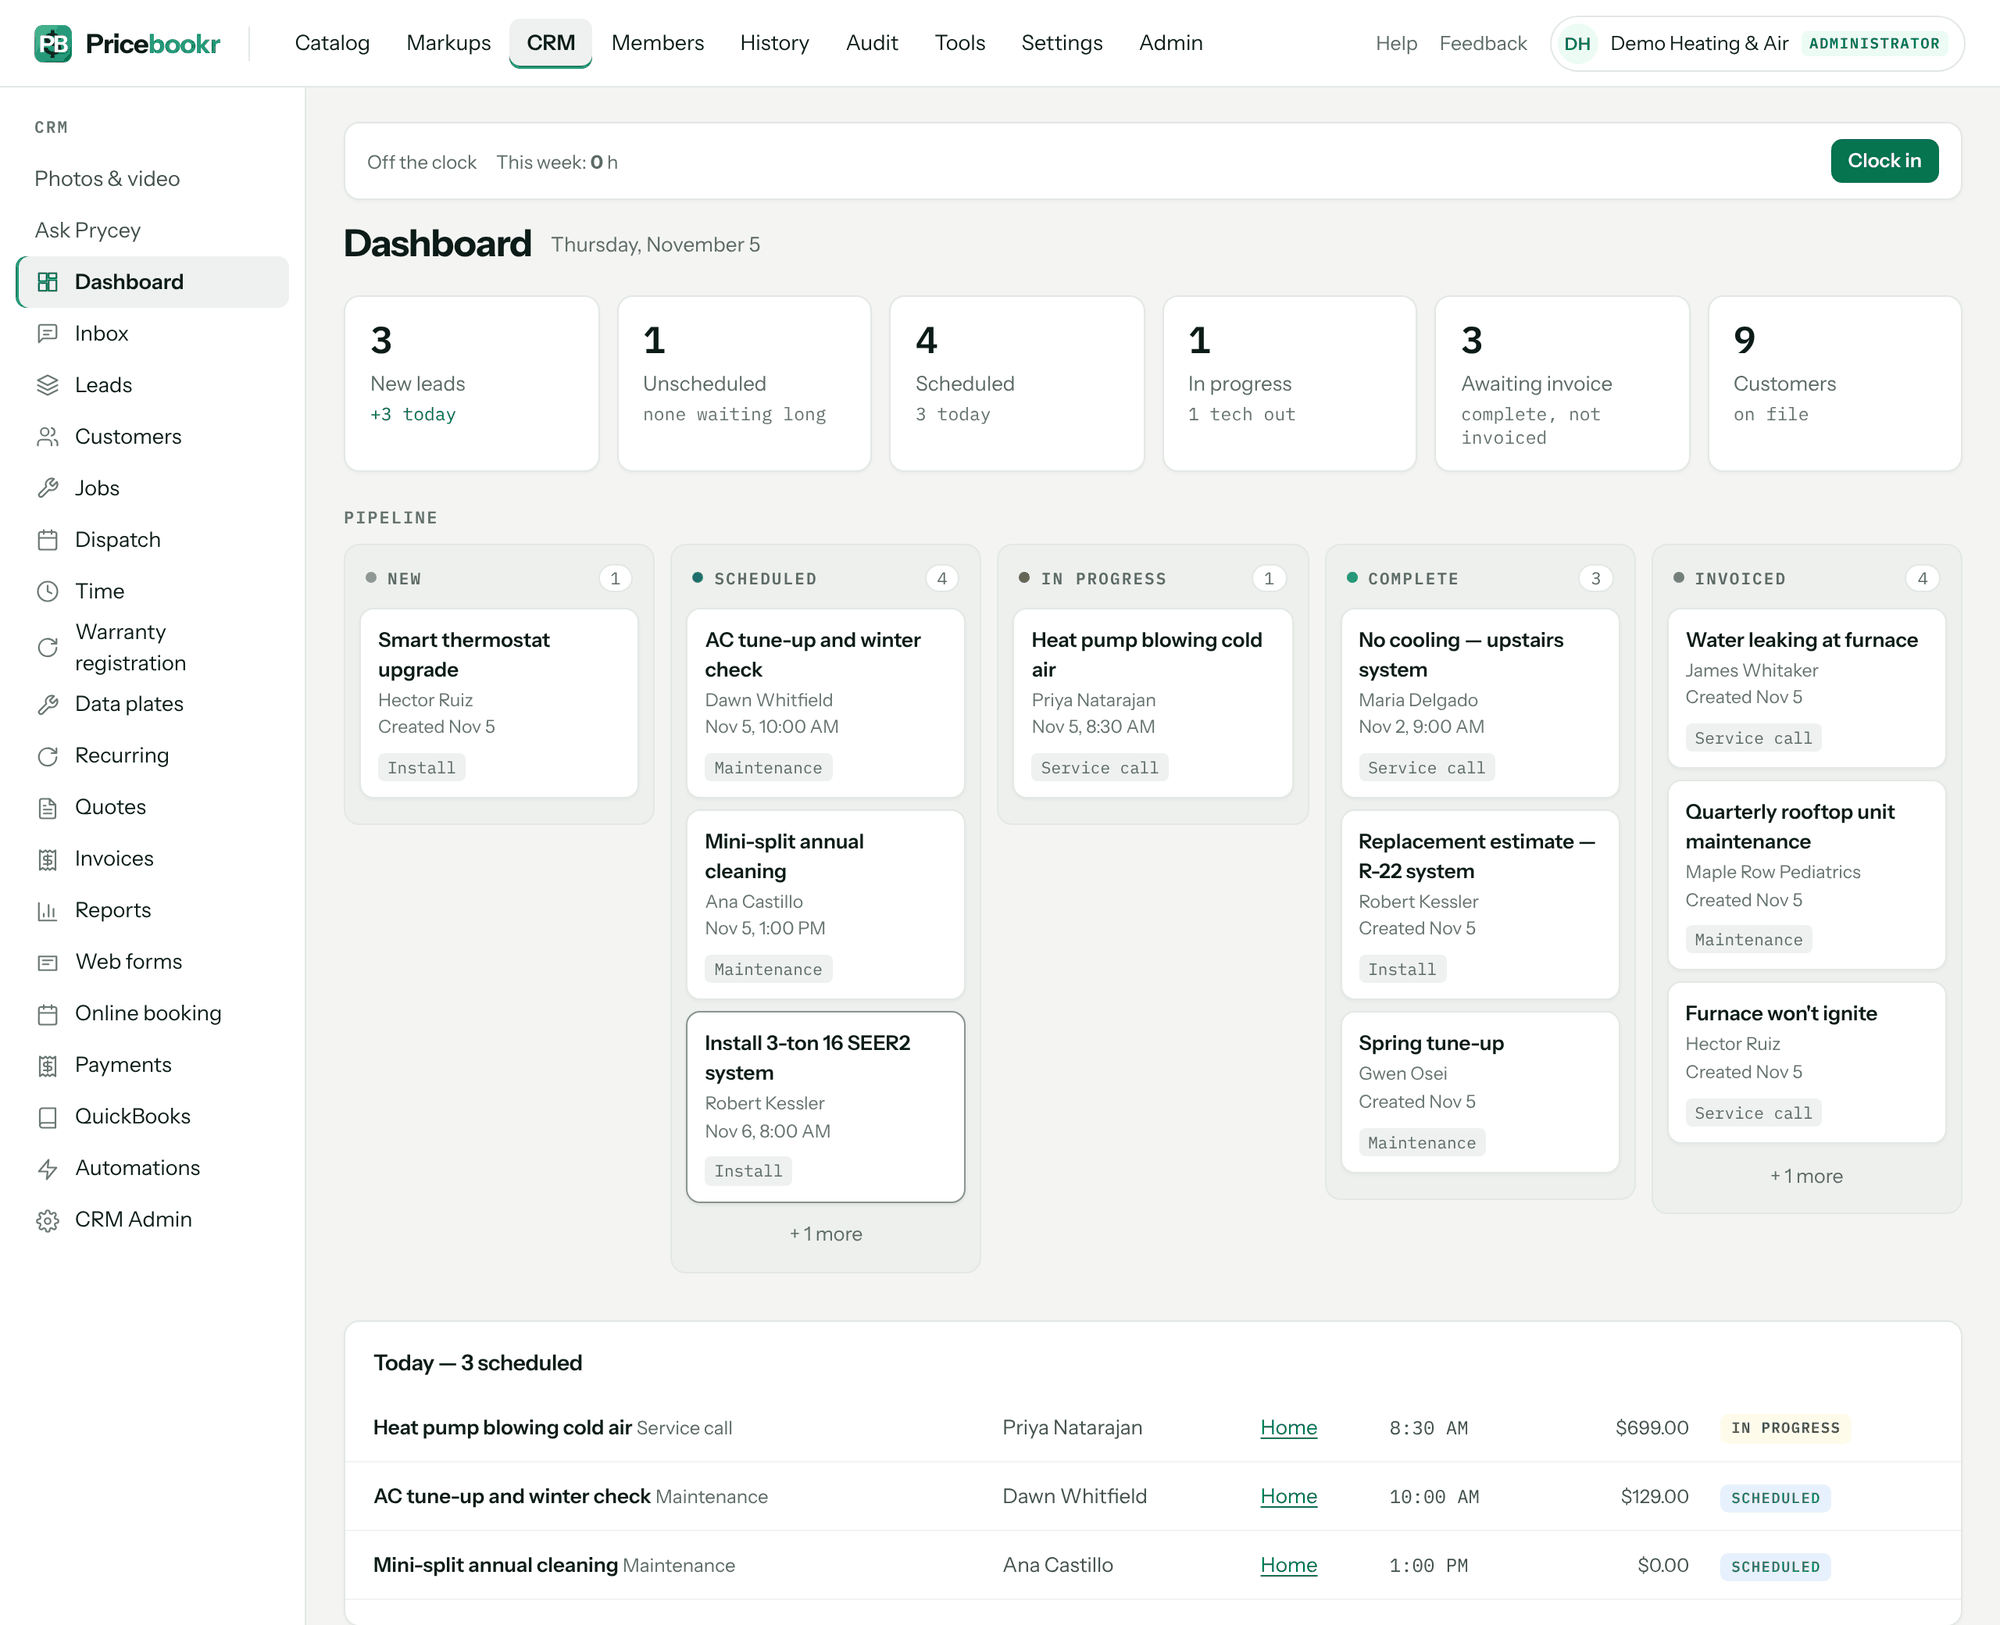
What each screen is for
The left-hand menu changes by role. A tech sees their own work under different names, and office-only screens don't appear for them at all.
| Menu item | What it's for | Admin | Sales | Field |
|---|---|---|---|---|
| Dashboard | Counts for New leads, Unscheduled, Scheduled, In progress, Awaiting invoice and Customers; the job pipeline; today's schedule. A tech's version is headed My day. | Yes | Yes | Yes |
| Inbox | Customer text conversations. A tech sees only their own jobs' customers. | Yes | Yes | Yes |
| Leads | New enquiries before they're customers; Convert to customer when they book. | Yes | Yes | No |
| Customers | Customers, their service locations, equipment, photos and history. | Yes | Yes | Read only, plus equipment |
| Jobs / My jobs | Every job and its status. A tech sees the jobs they're on. | Jobs | Jobs | My jobs |
| Dispatch / My schedule | The board of visits by tech and day. | Dispatch | Dispatch | My schedule |
| Time / My time (Pro plan) | Shifts, breaks and timesheets. | Time | My time | My time |
| Warranty registration | Equipment warranties to register. | Yes | Yes | No |
| Data plates | Data plate scans waiting to be confirmed as equipment. | Yes | Yes | No |
| Recurring | Recurring maintenance visit series. | Yes | Yes | No |
| Quotes | Good/better/best quotes and their approvals. | Yes | Yes | No |
| Invoices | Draft and issued invoices. | Yes | Yes | No |
| Reports | Receivables aging, money in, fees, equipment sales. | Yes | Yes | No |
| Web forms | Lead forms for your website. | Yes | Yes | No |
| Online booking | Homeowners booking their own estimate visit. | Yes | Yes | No |
| Payments | Payment setup, payments and payouts. | Yes | Yes | No |
| QuickBooks | QuickBooks Online connection and sync log. | Yes | Yes | No |
| Automations | Everything the app does on its own. Only an admin can switch one off. | Yes | Read only | No |
| CRM Admin | Shop-wide CRM settings in sections — Jobs & field, Quotes, Invoices & tax, Branding, Texting, Memberships — and the CRM Trash. | Yes | No | No |
Above the menu, Photos & video is there for everyone, and the office also gets Ask Prycey, the assistant — see Prycey. If a tech follows a link to an office screen, they see … is an office screen and a button back to their day; nothing is broken.
First-week checklist
Do these in order. Each one is a short job, and each links to its own guide.
- Put your name on it. Add your business address under Settings → Company, then your logo and colors under CRM → CRM Admin → Branding. They appear on quotes, invoices and the customer portal. See CRM Admin settings and Share a branded customer portal.
- Set up payments. An admin connects Stripe so customers can pay deposits and invoices online. See Set up card and bank payments.
- Bring your customers in. Import from Jobber, Housecall Pro or a spreadsheet, or add them by hand. See Import your customers and price book and Add customers, properties and equipment.
- Check your settings. Sales tax (CRM → CRM Admin → Invoices & tax), quote approval terms (CRM Admin → Quotes) and what techs can see (CRM Admin → Jobs & field). See CRM Admin settings.
- Invite your team with the right role for each person. See Invite your team.
- Get the app on your techs' phones. See Use the Pricebookr app on iPhone and Android.
- Send your first quote. Build good/better/best options from your price book and send it. See Build good/better/best quotes and send them.
You'll know it worked when your first customer approves a quote online and the job shows up on the dashboard under Scheduled or Unscheduled.
Troubleshooting
| You see | Why | Fix |
|---|---|---|
| Your company's admin hasn't accepted the Data Processing Addendum yet. Ask them to open the CRM and review it. | The addendum is accepted once per company, by an admin. | An admin opens the CRM and clicks Accept and open the CRM. |
| … is an office screen | You're signed in with the Field role and opened an office-only screen. | Ask whoever runs the office to look, or to change your role. |
| No CRM Admin in the menu | Only admins see it. | Ask an admin to make the change, or to change your role. |
| No Time in the menu | Payroll time tracking is on the Pro plan. | An admin changes plan under billing. See Clock in, breaks and timesheets. |
Questions: [email protected].